|
|
|
|
The Making of a Bergonzi violin 1 preparing the mould and blocks | 2 The Rib Garland | 3 Linings | 4 The back | 5 The Top | The neck is usually cut from one block of maple - and the cut it quartered the opposite way to the back plate. ie - the 'flashy figure' which shows most on the quarter cut is showing sideways rather than top bottom as in the back. This orientation of the block to the tree growth - that is, the fingerboard side would be facing the middle of the tree - the back of the scroll facing the bark - means that the lines of most weakness - the radial lines from centre of trunk out to bark ( as the wood would naturally shake when drying out ) is vertical through the neck and scroll. It is a little confusing to describe - more obvious when working with a block of wood. Both the Bergonzi and the Viotti I did with grafted scrolls from new. Violins often have grafted scrolls, as most all old instruments have been re-necked from their original more baroque style set up - so to preserve the original scroll they are grafted onto a new neck. If you do it from mew - it is much easier to make the joint. The advantage - is basically one can have a plain scroll, which is better for peg action - and for carving, but retain a nice cosmetic figure on the neck itself. I have done it on a voila as well. It also saves wood - you can get two neck from one normal block - and use up those 'plain' block you 'don't really llike' for scroll blocks.
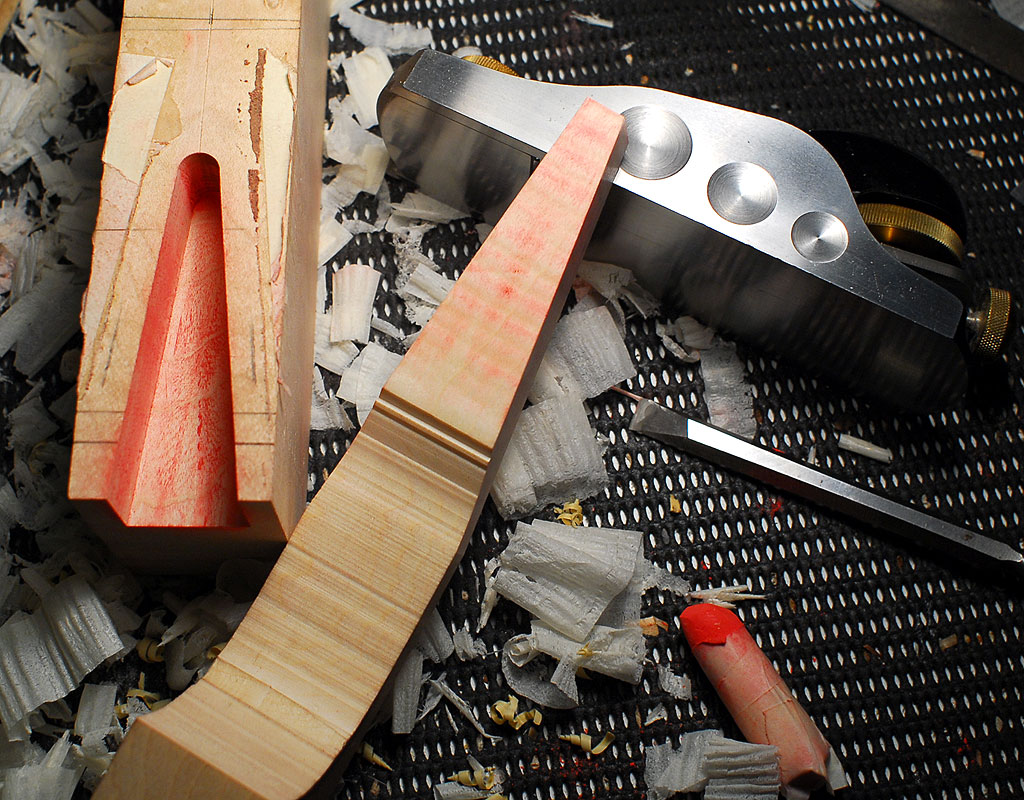
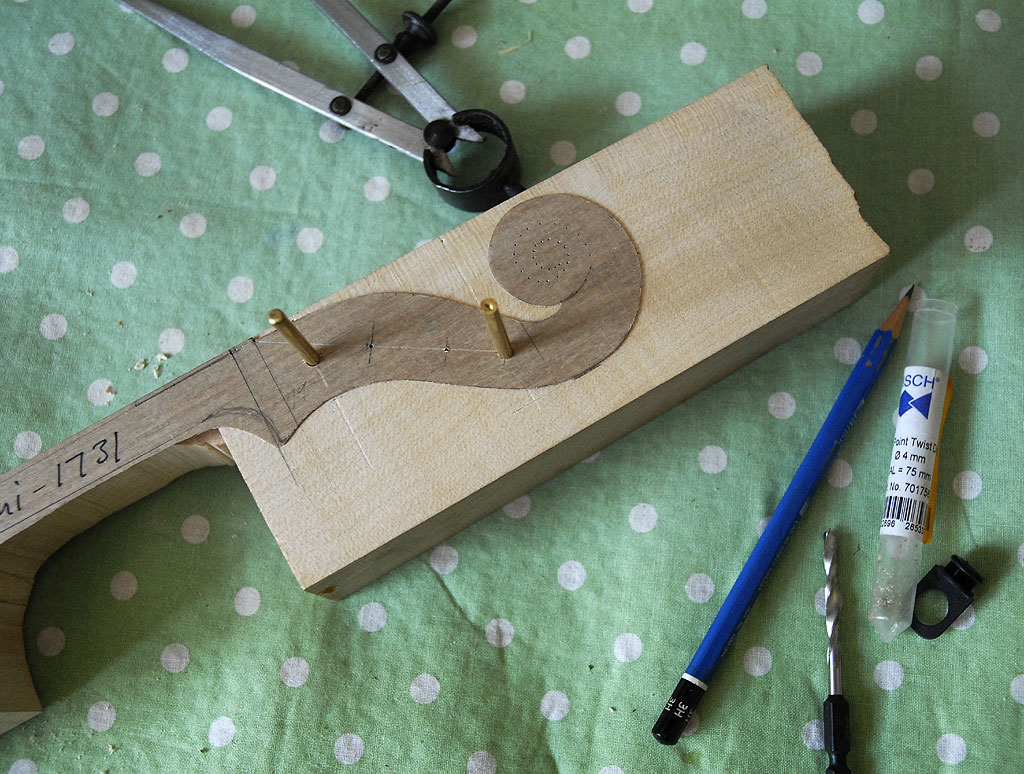
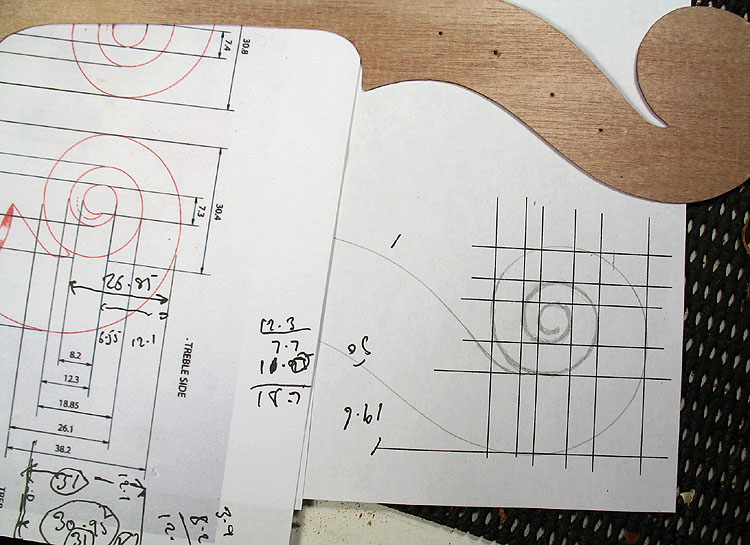
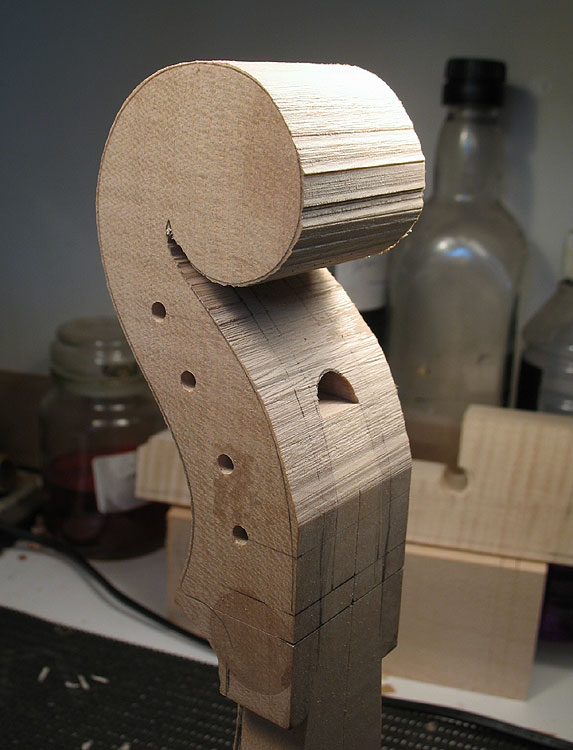
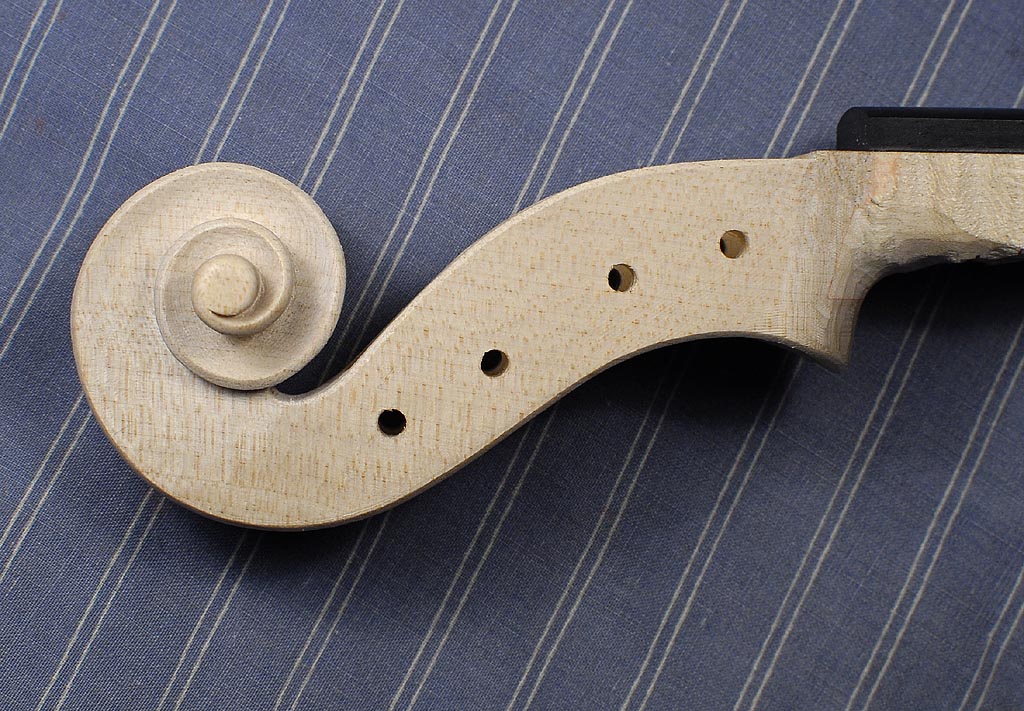
I generally make up a pattern as in ( 3) above and usually premark the peg hole positions. I drill them with a 4mm lip and spur just to start the hole from a marked point. With the block truely square I then drill them on a pillar drill. I find it better to mark them both sides and start the holes both sides - then drill them from either side on the pillar drill to the middle. That makes up for inaccuracies - mostly in the engineering of my pillar drill ! Its not the best bit of engineering ! The image (4) is of a strad poster drawing dimensions. These are supposedly correct figures - but the drawing of the scroll is generic. To do an accurate pattern you need to draw up the grid. Sometimes, if the scroll photo is actually sized lifesize - one can just check the figure to the photo and use that. Or - if you have Photoshop, you can scan the photo and resize it to the dimensions. Or - just make a rough drawing feehand of the scroll and just wing it ! It does not really matter. The one thing that needs to be right is the peg hole positions - or the strings will not all clear properly once set up. There is a system for that - marking from the nut line. All one has to do is establish a position for the back, A peg. It helps to have these peg holes drilled at 4mm. You can judge whether there is clearance under the holes when opening up the pegbox mortice. Its always a pain to have to deepen this once all the pegbox is finished. Sometimes it has to be done - the string winding must not contact the pegbox base, even if wound in an ungainly fashion ! There a loads of images of the process of carving a scroll on my flickr sets - if you are really trying to fathom it. Better to cut one - it never means much in pics and words. Use a bit a scrap. As you can see in the image above (5) the viotti neck blocks is only roughly sawn out on the bandsaw. I finish them by hand - saves changing the blade for a scroll blade. The finished Bergonzi scroll is below. The neck is still roughly finished.
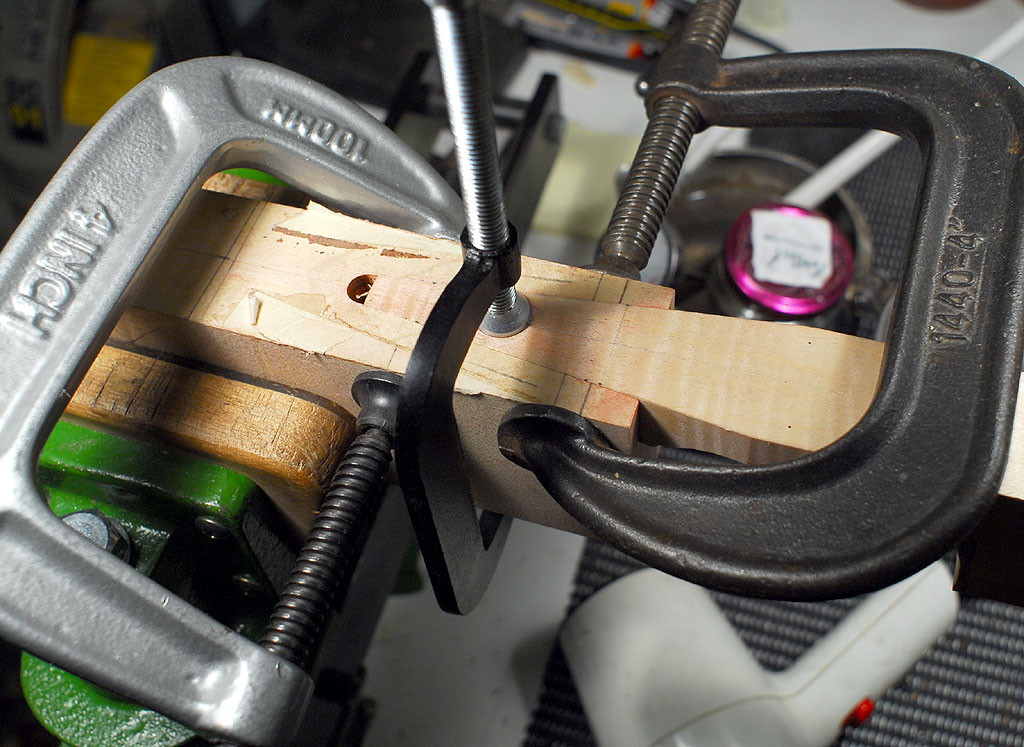
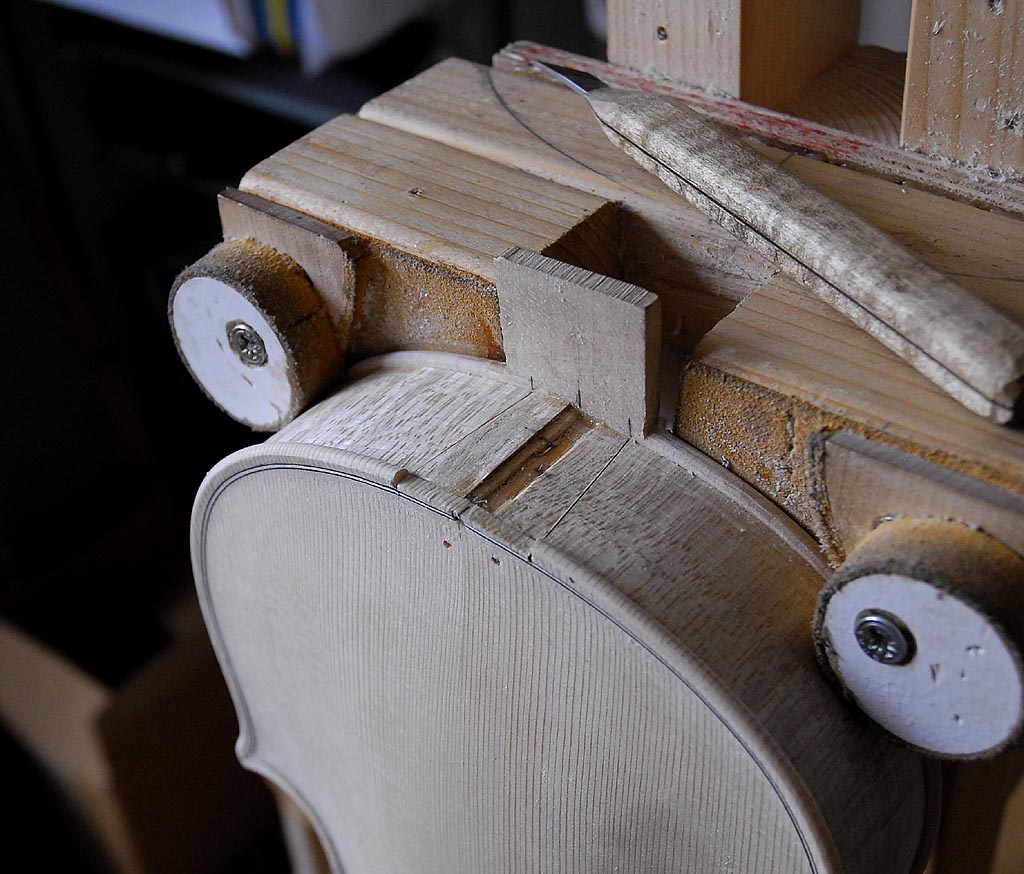
The neck section is left rough - the scroll can then be carved with something to hold it by easily. I always do the pegbox first - then the cut the scroll. While working on the scroll I prepare a fingerboard. I make my own board from ebony blanks - I know then what I am dealing with. The board is prepared to the exact size fo the intended neck width. They are not a simple thing to prepare. Once the board is right - that will dictate the width at the overstand. It is then lightly spot glued to the neck - while the neck is still oversized. The neck will be trimmed to the board. Before this - the end of the neck needs to be precisely cut to the correct neck angle - 85 or 87 deg and planed absolutely flat. This will be the face that fits into the neck mortice (2 above) It needs ot be flat, flat flat ! An 87 deg angle leaves the mortice somewhat deeper at the button than at the top plate. An 85 deg leaves a mortice more or less equal depth - just a matter of taste really. Before addressing the neck mortice joint - you have to decide on the width of your button. Then remember that the base of the neck root taper will be bigger than the eventual size of the button at the back face ( because of the taper ) Its easy to forget this and end up with a button thats a bit skinny. Not really a huge problem. The taper at the end of the neck is then planed true and flat - again, these faces need to be precisely flat - or fitting the neck mortice is a pain. I rough out the neck to close to final shape - and more or less finish the scroll. Once attached to the violin - anything 'heavy' on the neck ie rasping etc - feels rather awkward. When working on a scroll and neck you are attacking a piece of wood. Once the neck is glued in - you are attacking a violin ! So - we are ready to set in the neck. Not an easy thing to do. Above is my 'hold it all' holder, set in the vice upright so as to make it easeir to work on the mortice. I have carefull measured the end of the neck root - and have transferred those to the rib section. It helps to make those two cuts right ! |